Showing posts with label LMS. Show all posts

Tuesday, February 23, 2016

Teaming on Tuesdays: Next Steps with Schoology

By The CollabLab Team
 
Today during our Teaming on Tuesdays series, we had the opportunity to see multiple teachers using Schoology in a variety of ways. If you missed this Teaming on Tuesday, read on to see what we learned, and check out this previous post, Schoology Resource Bonanza, for helpful resources.

Our Teaming on Tuesday format once again gave teachers the opportunity to visit a classroom for ten minutes to see strategies in action, and then follow up in the Collab Lab to continue to share ideas and examples to apply to our own classes. However, today for the first time, we invited students to join us for our class-visits and follow-up Learning Labs.  Each period,1-2 student tutors from the Mastery Lab joined us. We learned so much from the perspective of the students!

During periods 1 and 5, we watched French students in Kirsten Fletcher's classes upload pictures to a Schoology Media album, then engage in impromptu discussions based on those pictures. This activity allowed for some student choice and creativity while at the same time curating resources for later use.

Sandra Lee and Katie Winstead were gracious enough to pause their independent reading and have students engage in a Schoology discussion about what they like and dislike about Schoology. It was interesting to hear their perspective on how some of their teachers use the technology.  It was a good reminder that technology alone does not foster learning. It depends on how it is used.

In Quinn Loch's AP Environmental Science class, students began with a Schoology agenda, clicked on a link to a video, and completed a formative Schoology quiz. Students also gave us feedback on how their teachers use Schoology.

Carmen Ruiz-Bergman's classes showed us the benefits of a clear course set-up, as well as using the event feature to share the day's agenda.  Students like seeing what is expected of them that day, when upcoming assignments will be due, and being able to go back to look at things they missed if they were absent.


Just a few of the many takeaways from the day:
  • Students report that they like having an agenda (calendar event) posted so they can follow along in class, make up work when absent, or check to see what homework is due.  Some students also liked how teachers post the handout for the day on the agenda as well.
  • Students like the organization of Schoology. They like being able to find documents easily and not having to carry papers to class.  They suggest teachers take a look at how they name documents to help make things easier to find!
  • Students do like when teachers post reminders via Updates.
  • Students only really look at comments and feedback if they have notifications turned on. More would look at them if teachers gave a few minutes in class to do this. Also, comments show up in different places in Schoology depending on whether an assignment is graded or not.
  •  Students really appreciate getting immediate feedback via Schoology and having the opportunity to do practice quizzes before summative tests. They like when teachers give feedback on free response quizzes and discussions.

  • Students would like Schoology to add a private message feature so they could message their teachers directly from the app.
Look for more blogs about these topics again in the future! 

Thanks to the following staff members who took time out of their busy day to join us: Effie Kalkounos, Matt Smolka (intern), Cassie Yoon, Jon Wong, Sue Montemayor, Sharon Horwath, Matt Bohnenkamp, Katie Kalmes, Sandra Lee, Elyse Hoffman (Wheeling High School), Cliff Darnall, Dean Burrier-Sanchis, and Kristina Lopez (student teacher).

Thanks also to our incredible Mastery Lab tutors who gave us the student perspective on Schoology: Irene Tijerin, Katelyn Eul, Sam Ivers, Gabby Vazquez, Hana Crnovrsania, Emily Gable, Justin Ethithira, Tiffany Waldrom, Niki Tingas, Breanna Keenly, Sejal Vora, and Ray Salarzano.

Monday, August 24, 2015

Schoology Calendar to Organize a Course

By Mark Heintz

Schoology allows a variety of ways to organize a course.  I mainly use Schoology calendar events to guide students in my course.  I use the calendar over folders or updates because I structure my course with daily objectives and activities.  Calendars are how I plan, so it makes logical sense to me to use the calendar.

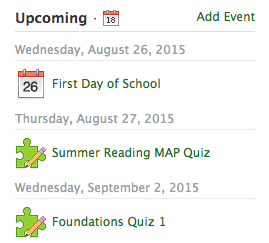
For students, posting all of the contents for the lesson in the daily calendar focuses students right away with an easy to follow routine. At the start of every class, students go the calendar to begin.  In the pictures below, the calendar is shown on the right display on the iPad or web.  If you have upcoming quizzes or assignments, the students are exposed to tasks that need attention.  Daily routines keep students focused and guide behaviors into learning focused activities at the beginning of class.


In the calendar, I can post the objective for the day, step by step instructions, images, videos, worksheets, readings, and web links.  I often post images for my bell ringers.  Students can see the images in color and zoom for further analysis. I post the question right there in the event.  This way I do not have to have a PowerPoint slide cued or write it on the board if I am coming into the class in a hurry. Calendar events allow students to post comments.  I often have the students post their answers to the bell in the comments.  

The calendar is great because it is ONE location for the entire lesson's materials. The students do not have to go to a discussion for a simple warm up or exit slip.  They can respond to other's comments, ask questions or do almost any feature a discussion can except grading.  For quick participation, the calendar is great. There are less transitions for students to get lost in the shuffle.  It maximizes classroom time and allows for total participation.   It is really easy for students to post new comments.  Students can see all comments made.

Also, the calendar houses all of the daily materials.  There is little redirection for students to access any of the daily materials. I teacher regular level freshmen, so I try to minimize transitions.  Another benefit is the students can go back to the event for any of the daily activities. If you are using pdfs, the event can have the links that students wouldn't be able to click.

At the end of the class, the calendar provides the opportunity for teachers to have an unplanned exit slip.  If there is extra time, you can have students post three things they learned, a question they have,  a summary of the lesson, or anything else you normally do as an exit slip.  The best part, if you created the event, there is a venue for students to post comments without creating anything new!

Another great feature of the calendar is it automatically archives the event.  Students can go back to any event in the entire semester.  If they miss a day they can go through the calendar and see everything they missed.


If you want to know more about how to do specific features in calendars, Schoology created a how to page. You can access it by clicking here.

Thursday, February 5, 2015

How to Create a Schoology Checklist

By: Rachel Barry


A Schoology Checklist is a great tool to hold students accountable for completing assignments in a designated order.  You can use this as an instructional tool for students to complete a warm-up at the beginning of class or to read an article before answering a discussion question.  At Elk Grove High School, some of us math teachers have used this tool to foster individualized learning in our classes.  Here is a set of step-by-step instructions of how to create a Schoology Checklist.  Before you begin, you should convert your documents to .pdfs and have the web addresses ready for any links that you will be posting.


  1. Create a Folder
It is not necessary to create a separate folder for the Checklist, as it will still work
with other documents in the folder.  I have found, however, that it is easier for
students to understand what it is they need to complete when the Checklist is
separate from the rest of the materials of the topic.


    2.  Upload all Materials
Make sure that any materials (documents, links, discussion questions, quizzes, 
etc.) are uploaded in the correct order that you want the students to complete.


    3.  Create the Checklist!
Click on “Options” and then “Student Completion”.  Follow along with the video for
step-by-step directions!

     4.  Check Students' Progress
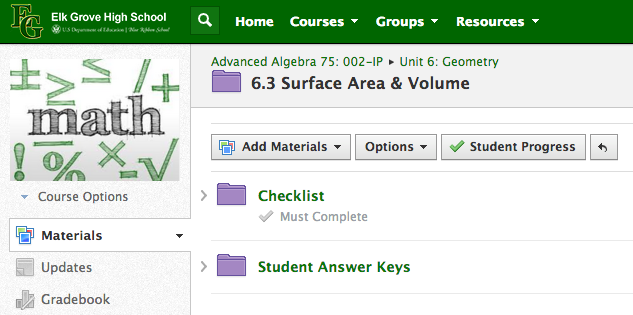
           Click on "Student Progress" and see each student's percentage of completion.


          Click on a student's name and see the individual progress of each student.


Things to Note:
  • You cannot copy a Checklist to another course.
It appears that you are able to copy a checklist, however, when the students access the 
Checklist, the "Requirements must be completed in order" does not transfer. Students have 
access to all items. In order to set up the Checklist again, you must delete all items from the 
Checklist and Save. Then, you can recreate the Checklist.

  • You see a completion percentage for each student, but they do not see their own.
I have posted on the Schoology Web Platform for this feature to be added to the student app, 
as a gameification feature that moves from red to yellow to green based on the percentage of 
completion. It has not happened yet, but I am hoping that it is coming in the future!